时间 2024-03-20 14:38:11
 作者 admin
 来源
来源 Win10系统怎么设置共享?其实在我们的日常办公中,将一些需要共享的文件直接放置在局域网上共享,可以方便的供其他同事随时下载查看等,十分省事省力。但是有用户第一次介绍文件共享,还不清楚具体的设置方法,对此,下面小编带来了详细的文件共享设置教程,我们来看看吧。

Win10共享设置方法:
步骤一:启用网络发现
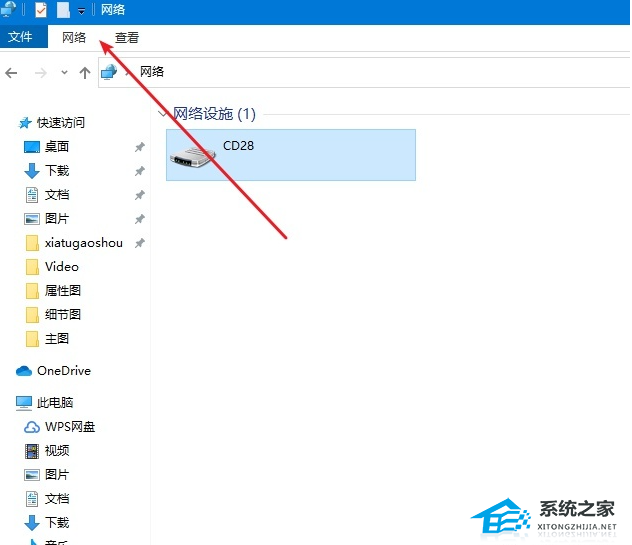
1. 打开桌面上的“文件资源管理器(此电脑)”。点击顶部-网络。
2. 点击下面更改高级共享设置。

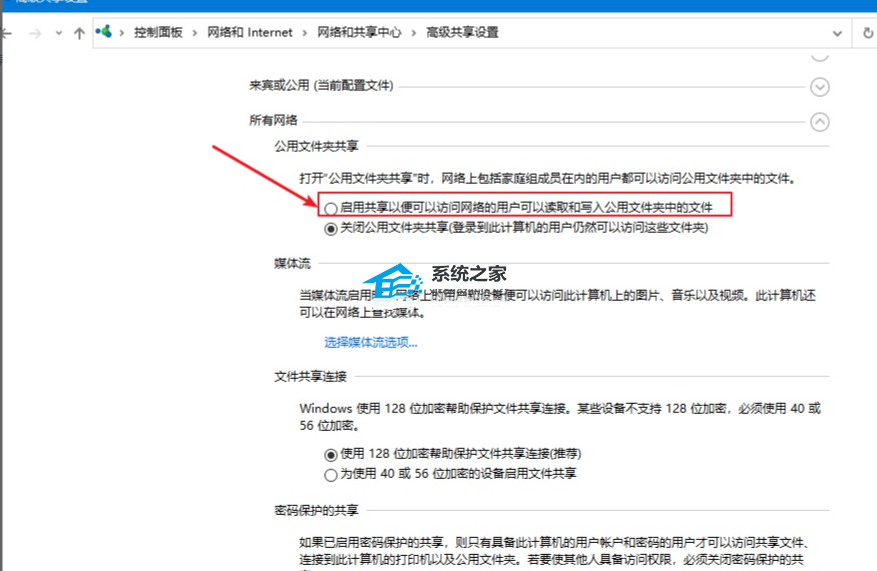
3. 点击所有网络。
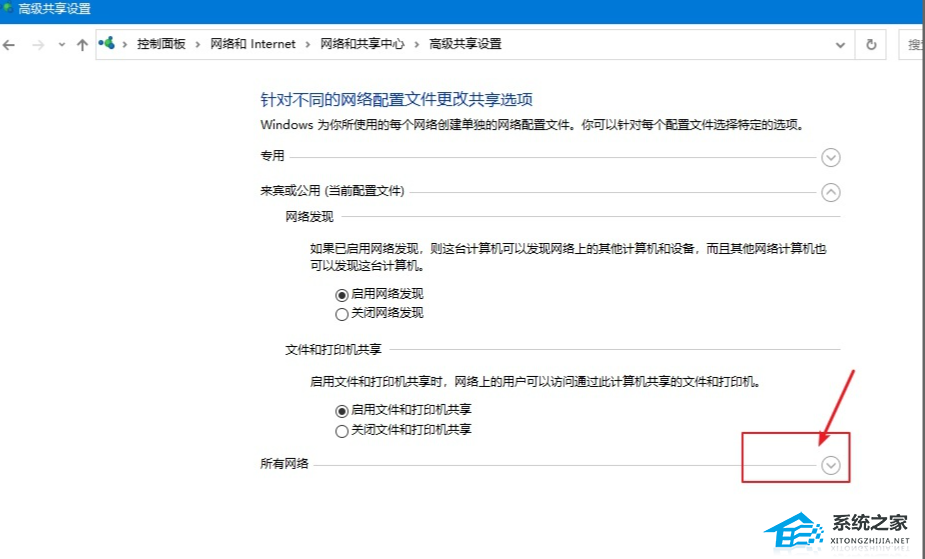
4. 启用共享以便可以访问网络。
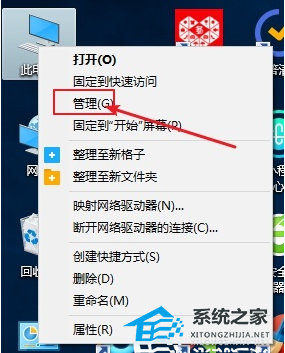
第二步:开启 guest访客模式
1. 鼠标右击点击电脑,选择管理。
2. 打开的计算机管理,依次展开系统工具-->本地用户和组-->用户。
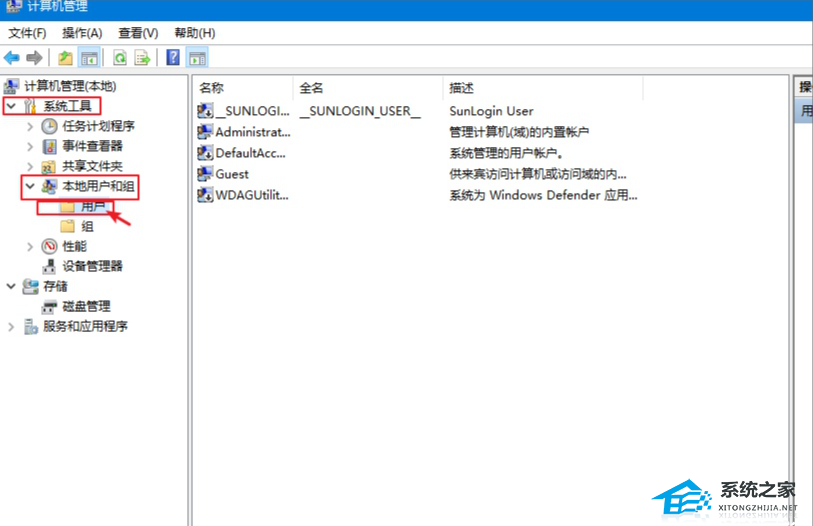
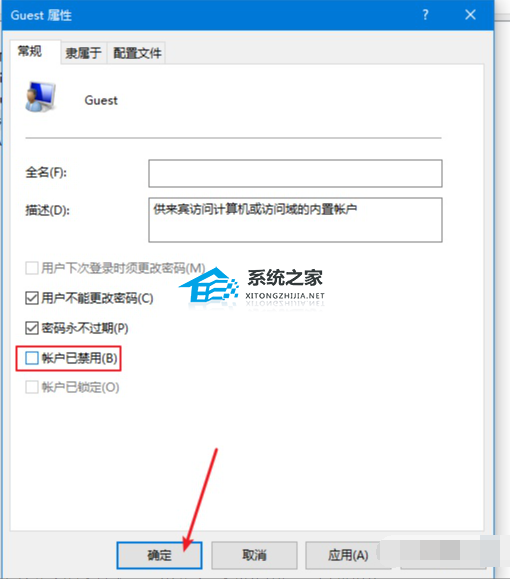
3. 右侧可以看到全部用户,一般都有Guest账户,如果没有请添加一个,我们右击Guest点击属性,然后把“账户已禁用”去掉勾选,点击确定。同时您可以设置登陆密码。
第三步:共享文件夹
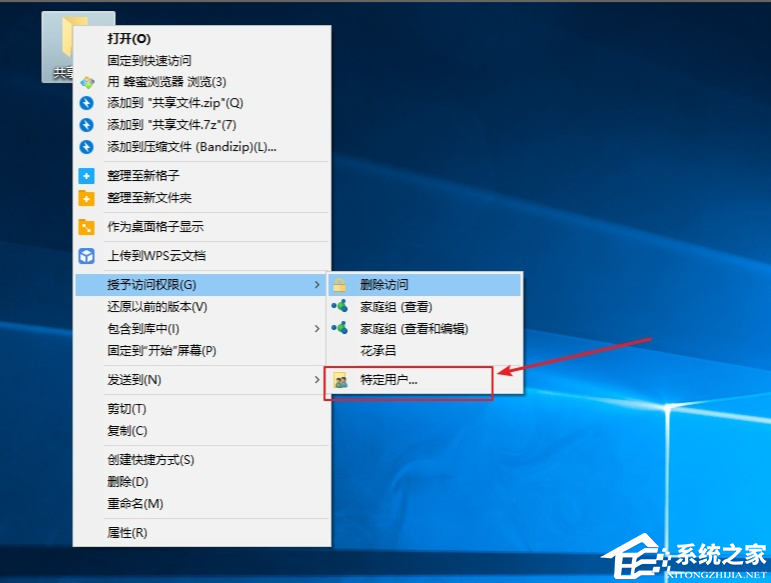
1. 鼠标右击需要共享的文件夹,点击共享-->特定用户,下图所示:
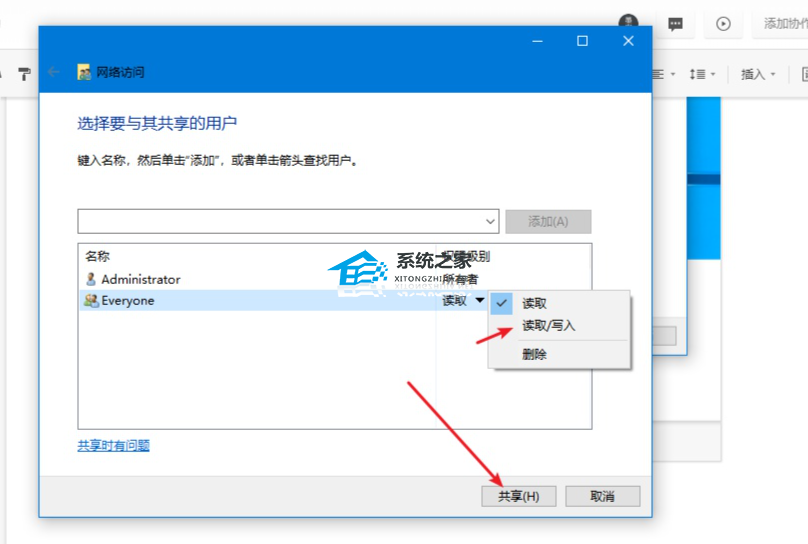
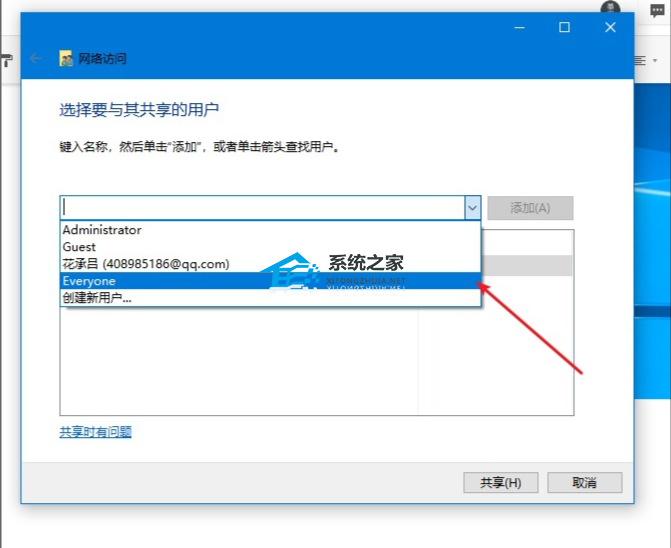
2. 出现搜索框点击下拉图标,选择Everyone,然后点击添加,下图:
3. 根据权限设置读取还是写入,然后点击共享就完成了。