时间 2023-05-07 11:51:28
 作者 yanhua
 来源
来源 

 立即下载
立即下载
很多人可能觉得重装系统是件很麻烦且困难的事,其实不然,现在市面上的重装工具使用起来都很简单,轻松帮助用户安装系统。那么小编下面就给大家整理了联想Win10重装系统的教程,希望可以帮到大家。
系统之家重装联想Win10图解:
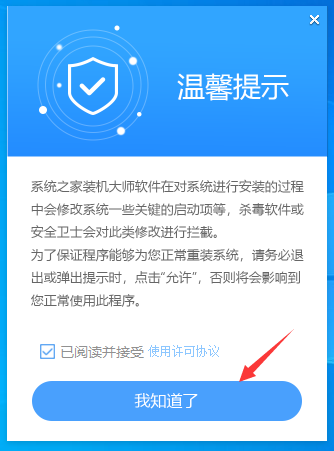
首先,下载【系统之家装机大师】;下载完毕后,关闭所有的杀毒软件,然后打开软件,软件会进行提示,仔细阅读后,点击我知道了进入工具。
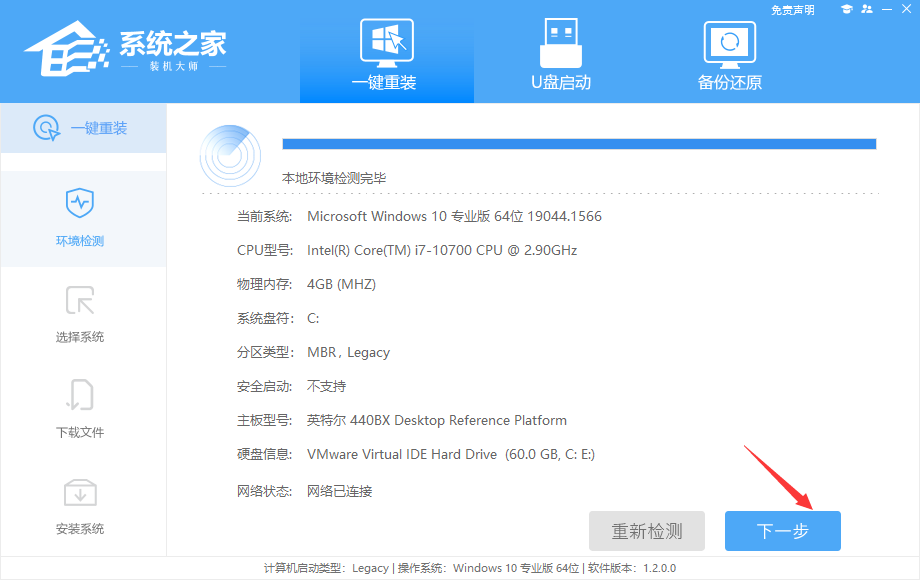
进入工具后,工具会自动检测当前电脑系统的相关信息,点击下一步。
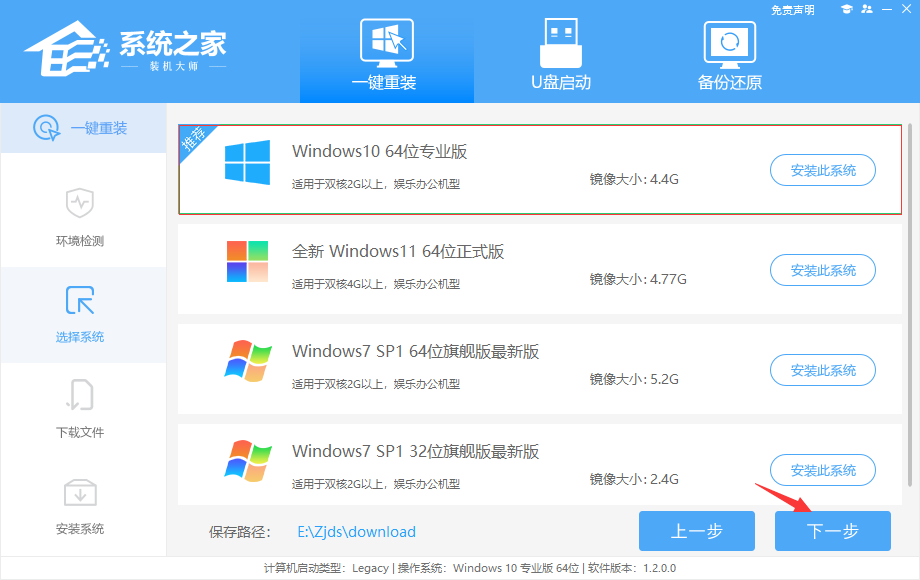
进入界面后,用户可根据提示选择安装Windows10 64位系统。注意:灰色按钮代表当前硬件或分区格式不支持安装此系统。
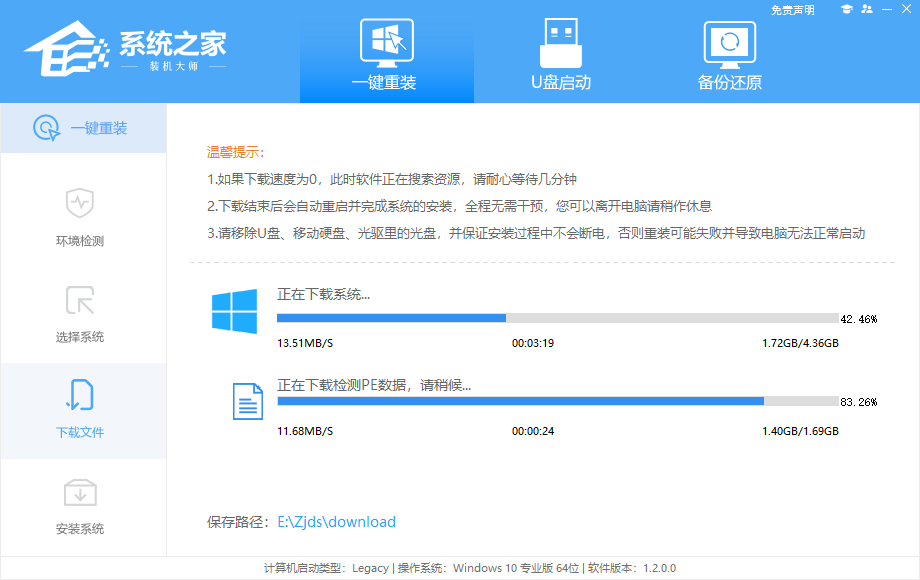
选择好系统后,等待PE数据和系统的下载。
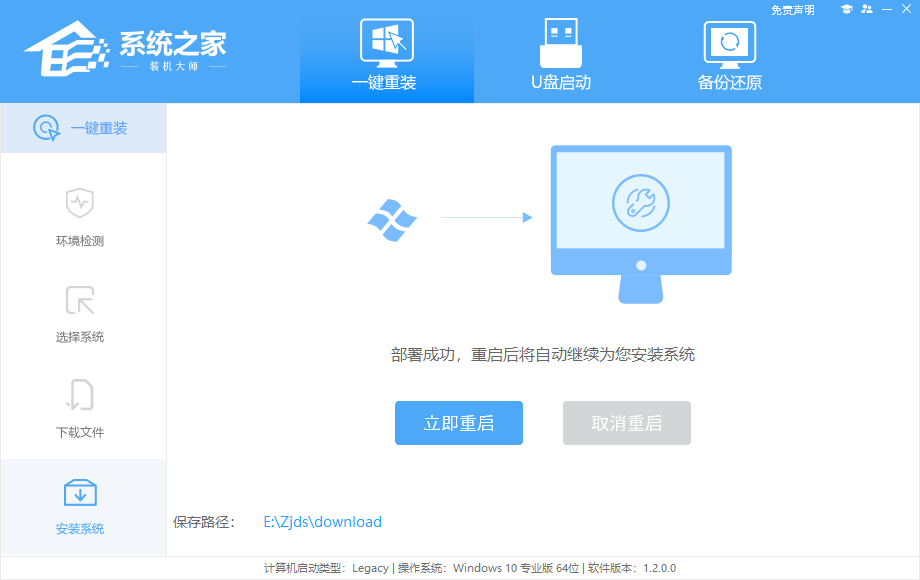
下载完成后,系统会自动重启系统。
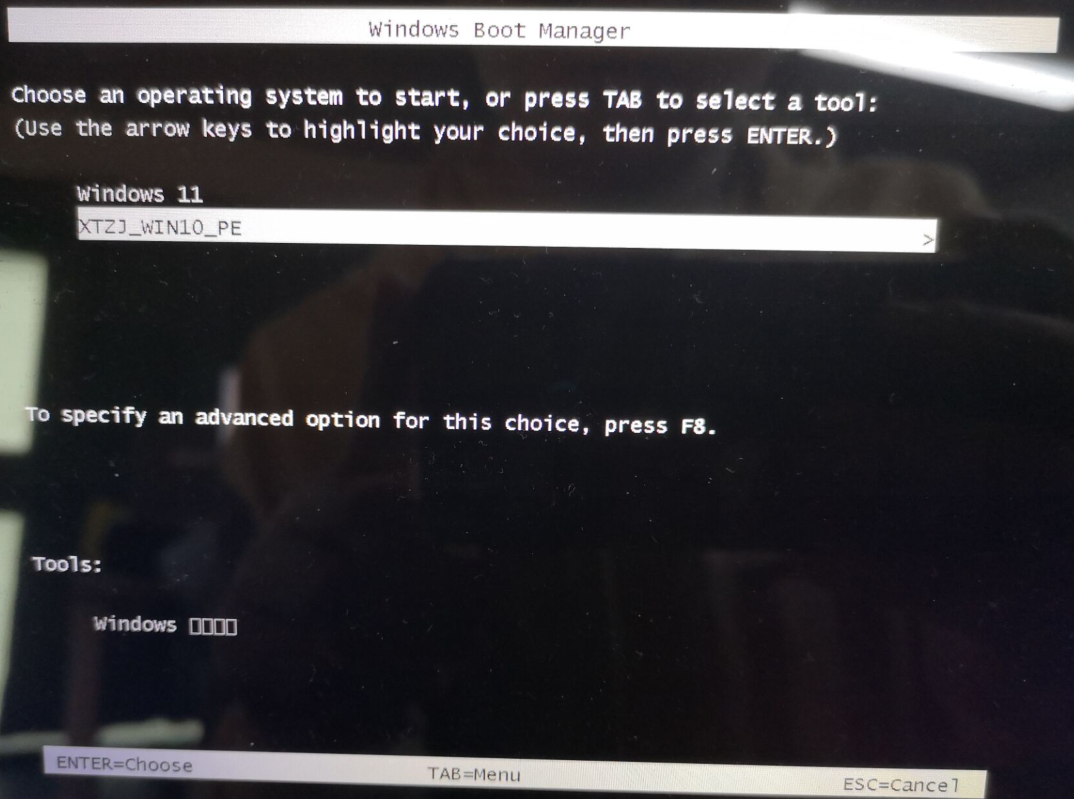
重启系统后,电脑将会进入一个启动项的选择,这时我们选择【XTZJ_WIN10_PE】回车。
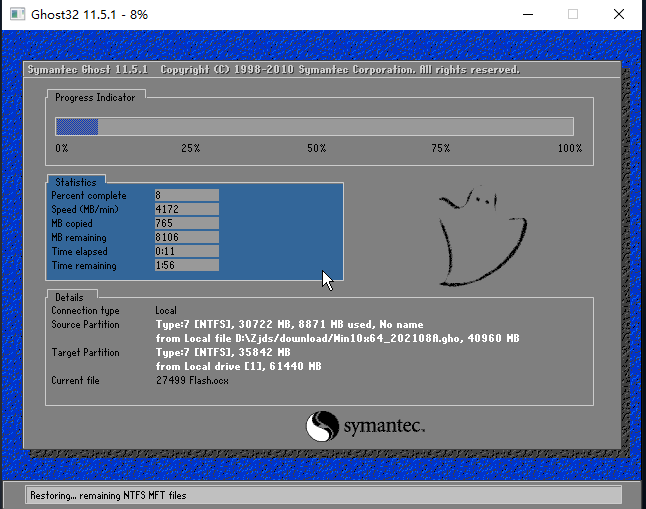
进入后,系统将会自动进行备份还原,等待完成。
系统备份完成后,将会再次重启,自动进入系统安装界面,这时等待系统安装完成就大功告成了!