时间 2022-12-01 14:01:26
 作者 admin
 来源
来源 win7系统自动配置更新设置关闭的方法分享。有用户发现自己的电脑在开机的时候或者是关机的时候,会出现配置更新的情况,导致自己需要去进行等待才可以进行正常的使用。那么如何将自动更新关闭呢?来看看具体的操作方法吧。
解决方法
方法一:
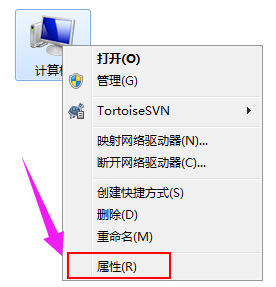
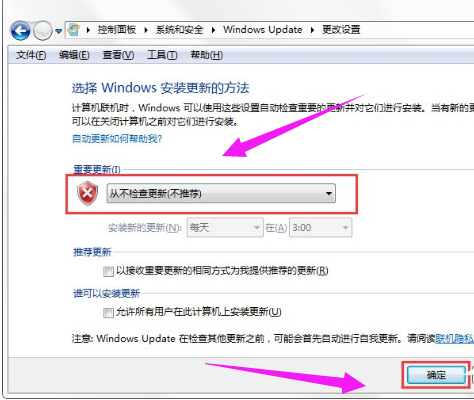
1、在“计算机”上右键,选择:属性。
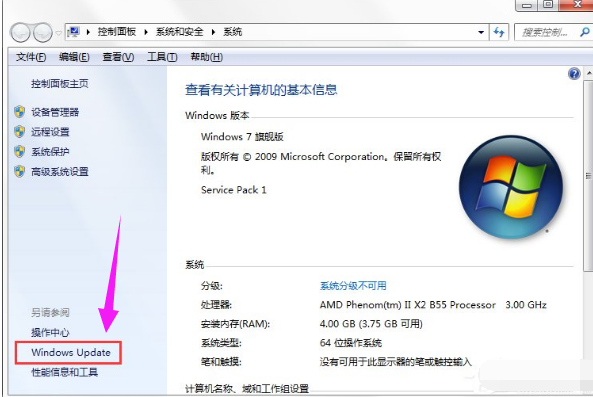
2、找到并点击“windows Update”。
3、然后点击“更改设置”。
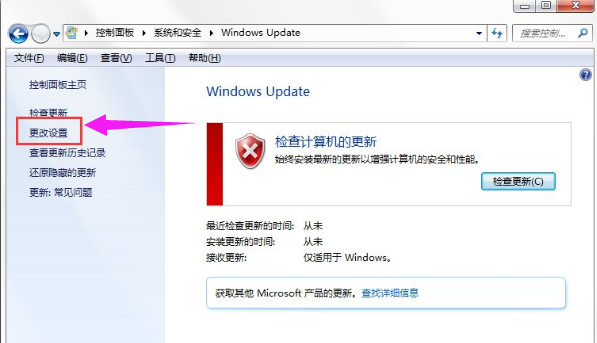
4、点击“从不检测更新”,然后点击:确定。
方法二:
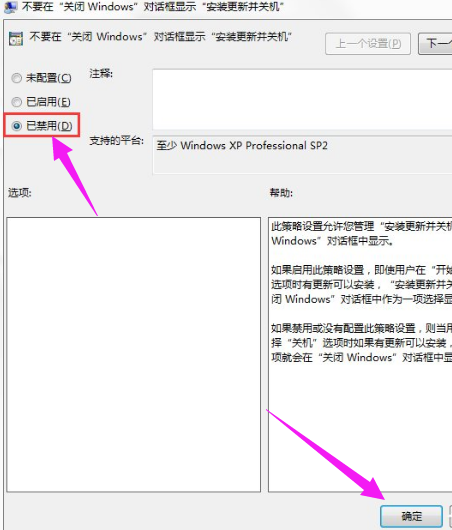
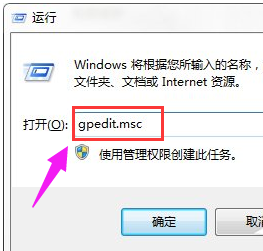
1、按WIN+R 在窗口中输入:gpedit.msc 然后点击确定。
2、依次展开后,点击“不要在关闭Windows对话框显示“安装更新并关机”后。
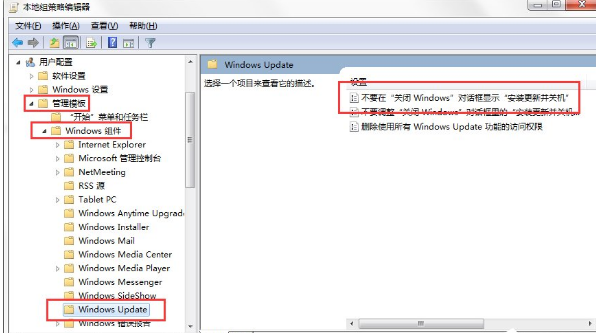
3、选择已禁用,然后应用并确定。